客户端数据库持久化
初始化数据库表
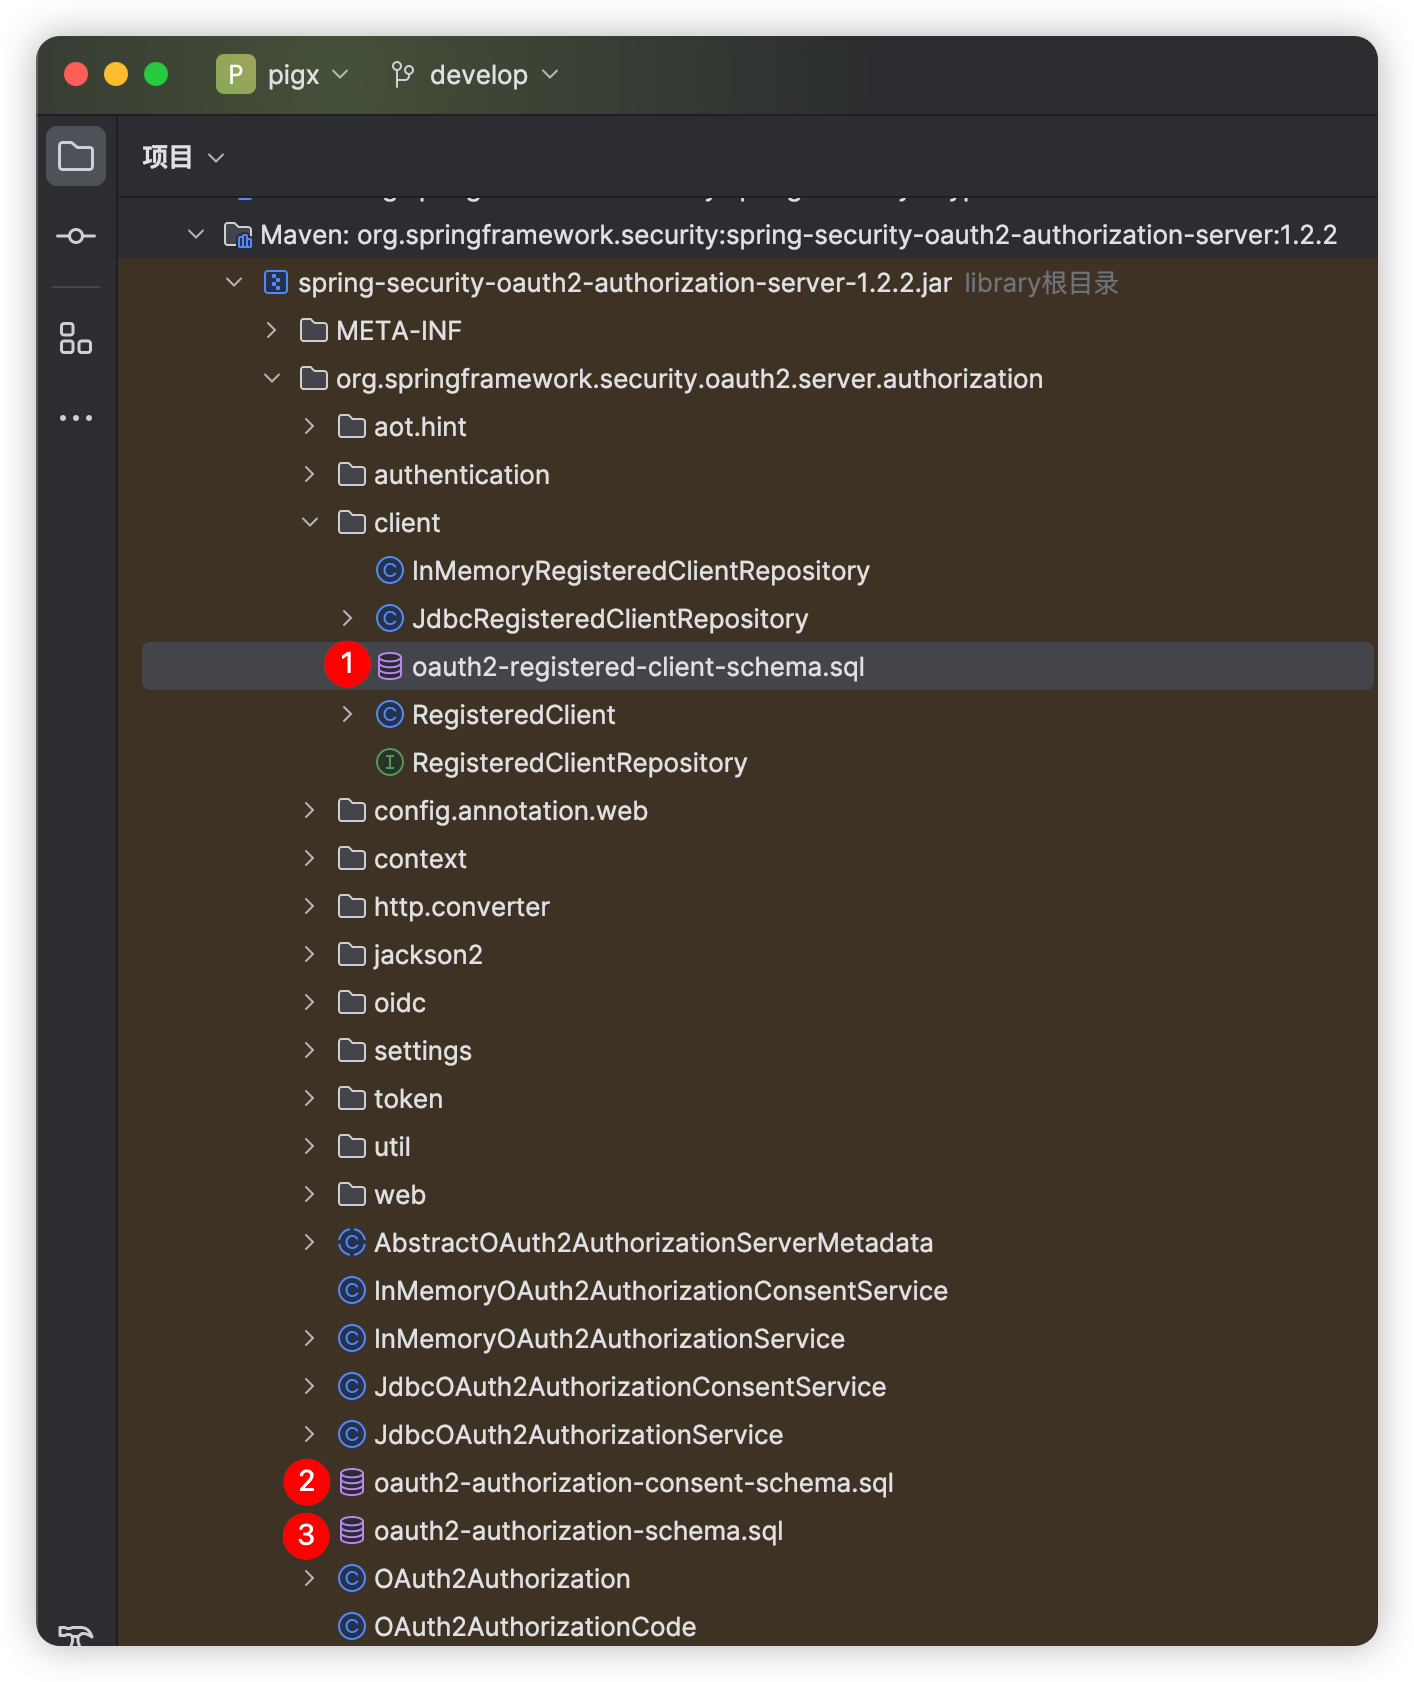
临时引入依赖,方便查看官方jar包中的sql脚本
xml
<dependency>
    <groupId>org.springframework.security</groupId>
    <artifactId>spring-security-oauth2-authorization-server</artifactId>
    <version>1.2.2</version>
</dependency>
schema位置如图
客户端表
oauth2-registered-client-schema.sql
sql
CREATE TABLE oauth2_registered_client (
    id varchar(100) NOT NULL,
    client_id varchar(100) NOT NULL,
    client_id_issued_at timestamp DEFAULT CURRENT_TIMESTAMP NOT NULL,
    client_secret varchar(200) DEFAULT NULL,
    client_secret_expires_at timestamp DEFAULT NULL,
    client_name varchar(200) NOT NULL,
    client_authentication_methods varchar(1000) NOT NULL,
    authorization_grant_types varchar(1000) NOT NULL,
    redirect_uris varchar(1000) DEFAULT NULL,
    post_logout_redirect_uris varchar(1000) DEFAULT NULL,
    scopes varchar(1000) NOT NULL,
    client_settings varchar(2000) NOT NULL,
    token_settings varchar(2000) NOT NULL,
    PRIMARY KEY (id)
);
用户授权确认表
oauth2-authorization-consent-schema.sql
sql
CREATE TABLE oauth2_authorization_consent (
    registered_client_id varchar(100) NOT NULL,
    principal_name varchar(200) NOT NULL,
    authorities varchar(1000) NOT NULL,
    PRIMARY KEY (registered_client_id, principal_name)
);
用户认证信息表
oauth2-authorization-schema.sql
sql
/*
IMPORTANT:
    If using PostgreSQL, update ALL columns defined with 'blob' to 'text',
    as PostgreSQL does not support the 'blob' data type.
*/
CREATE TABLE oauth2_authorization (
    id varchar(100) NOT NULL,
    registered_client_id varchar(100) NOT NULL,
    principal_name varchar(200) NOT NULL,
    authorization_grant_type varchar(100) NOT NULL,
    authorized_scopes varchar(1000) DEFAULT NULL,
    attributes blob DEFAULT NULL,
    state varchar(500) DEFAULT NULL,
    authorization_code_value blob DEFAULT NULL,
    authorization_code_issued_at timestamp DEFAULT NULL,
    authorization_code_expires_at timestamp DEFAULT NULL,
    authorization_code_metadata blob DEFAULT NULL,
    access_token_value blob DEFAULT NULL,
    access_token_issued_at timestamp DEFAULT NULL,
    access_token_expires_at timestamp DEFAULT NULL,
    access_token_metadata blob DEFAULT NULL,
    access_token_type varchar(100) DEFAULT NULL,
    access_token_scopes varchar(1000) DEFAULT NULL,
    oidc_id_token_value blob DEFAULT NULL,
    oidc_id_token_issued_at timestamp DEFAULT NULL,
    oidc_id_token_expires_at timestamp DEFAULT NULL,
    oidc_id_token_metadata blob DEFAULT NULL,
    refresh_token_value blob DEFAULT NULL,
    refresh_token_issued_at timestamp DEFAULT NULL,
    refresh_token_expires_at timestamp DEFAULT NULL,
    refresh_token_metadata blob DEFAULT NULL,
    user_code_value blob DEFAULT NULL,
    user_code_issued_at timestamp DEFAULT NULL,
    user_code_expires_at timestamp DEFAULT NULL,
    user_code_metadata blob DEFAULT NULL,
    device_code_value blob DEFAULT NULL,
    device_code_issued_at timestamp DEFAULT NULL,
    device_code_expires_at timestamp DEFAULT NULL,
    device_code_metadata blob DEFAULT NULL,
    PRIMARY KEY (id)
);
配置客户端repository
java
/**
 * 配置客户端Repository
 *
 * @param jdbcTemplate    db 数据源信息
 * @return 基于数据库的repository
 */
@Bean
public RegisteredClientRepository registeredClientRepository(JdbcTemplate jdbcTemplate) {
    // 创建一个RegisteredClient对象,并设置其属性。
    // 使用UUID生成一个唯一的客户端ID。
    RegisteredClient registeredClient = RegisteredClient.withId(UUID.randomUUID().toString())
            // 设置客户端ID为"messaging-client"。
            .clientId("messaging-client")
            // 设置客户端秘密为"{noop}secret",这里的"{noop}"表示不加密。
            .clientSecret("{noop}secret")
            // 设置客户端认证方法为基于客户端秘密的基本认证。
            .clientAuthenticationMethod(ClientAuthenticationMethod.CLIENT_SECRET_BASIC)
            // 设置授权类型为授权码。
            .authorizationGrantType(AuthorizationGrantType.AUTHORIZATION_CODE)
            // 添加刷新令牌授权类型。
            .authorizationGrantType(AuthorizationGrantType.REFRESH_TOKEN)
            // 添加客户端凭证授权类型。
            .authorizationGrantType(AuthorizationGrantType.CLIENT_CREDENTIALS)
            // 设置授权码流程的重定向URI。
            .redirectUri("http://127.0.0.1:8080/login/oauth2/code/messaging-client-oidc")
            // 设置另一个重定向URI,可能用于其他授权流程。
            .redirectUri("http://127.0.0.1:8080/authorized")
            // 仅用于测试,接收授权码。
            .redirectUri("https://www.pigx.cn")
            // 设置用户注销后的重定向URI。
            .postLogoutRedirectUri("http://127.0.0.1:8080/logged-out")
            // 添加OpenID范围。
            .scope(OidcScopes.OPENID)
            // 添加Profile范围。
            .scope(OidcScopes.PROFILE)
            // 添加自定义范围"message.read"。
            .scope("message.read")
            // 添加自定义范围"message.write"。
            .scope("message.write")
            // 设置客户端设置,要求每次都需要用户授权同意。
            .clientSettings(ClientSettings.builder().requireAuthorizationConsent(true).build())
            .build(); // 构建RegisteredClient对象。

    // 创建另一个RegisteredClient对象,名为deviceClient,用于设备授权
    RegisteredClient deviceClient = RegisteredClient.withId(UUID.randomUUID().toString())
            .clientId("device-messaging-client")
            // 公共客户端
            .clientAuthenticationMethod(ClientAuthenticationMethod.NONE)
            // 设备码授权
            .authorizationGrantType(AuthorizationGrantType.DEVICE_CODE)
            .authorizationGrantType(AuthorizationGrantType.REFRESH_TOKEN)
            // 自定scope
            .scope("message.read")
            .scope("message.write")
            .build();

    // 创建一个JdbcRegisteredClientRepository实例,用于将已注册的客户端保存到数据库中
    JdbcRegisteredClientRepository registeredClientRepository = new JdbcRegisteredClientRepository(jdbcTemplate);

    // 初始化客户端
    if (registeredClientRepository.findByClientId(registeredClient.getClientId()) == null) {
        registeredClientRepository.save(registeredClient);
    }

    // 创建另一个RegisteredClient对象,名为deviceClient,用于设备授权
    if (registeredClientRepository.findByClientId(deviceClient.getClientId()) == null) {
        registeredClientRepository.save(deviceClient);
    }

    return registeredClientRepository;
}客户端设置(ClientSettings)说明
requireProofKey:当使用该客户端发起PKCE流程时必须设置为true。requireAuthorizationConsent:当设置为true时登录后会先跳转授权确认页面,确认后才会跳转到redirect_uri,为false时不会跳转至授权确认页面。jwkSetUrl:设置客户端jwks的url。tokenEndpointAuthenticationSigningAlgorithm:设置token端点对验证方法为CLIENT_SECRET_JWT,PRIVATE_KEY_JWT的客户端进行身份验证使用的签名算法。
token设置(TokenSettings)说明
authorizationCodeTimeToLive:授权码(authorization_code)有效时长。accessTokenTimeToLive:access_token有效时长。accessTokenFormat:access_token的格式,SELF_CONTAINED是自包含token(jwt格式),REFERENCE是不透明token,相相当于是token元数据的一个id,通过id找到对应数据(自省令牌时),如下
java
public final class OAuth2TokenFormat implements Serializable {
    private static final long serialVersionUID = SpringAuthorizationServerVersion.SERIAL_VERSION_UID;

	/**
	 * Self-contained tokens use a protected, time-limited data structure that contains token metadata
	 * and claims of the user and/or client. JSON Web Token (JWT) is a widely used format.
	 */
	public static final OAuth2TokenFormat SELF_CONTAINED = new OAuth2TokenFormat("self-contained");

	/**
	 * Reference (opaque) tokens are unique identifiers that serve as a reference
	 * to the token metadata and claims of the user and/or client, stored at the provider.
	 */
	public static final OAuth2TokenFormat REFERENCE = new OAuth2TokenFormat("reference");

}deviceCodeTimeToLive:设备码有效时长。reuseRefreshTokens:刷新token时是否重用refresh token,设置为true后refresh token不变,false刷新token时会重新签发一个refresh token。refreshTokenTimeToLive:refresh token有效时长。idTokenSignatureAlgorithm:设置id token的加密算法。
如果数据库已经存在客户端数据或不需要默认设置,则直接注入一个JdbcRegisteredClientRepository即可
java
/**
 * 配置客户端Repository
 *
 * @param jdbcTemplate    db 数据源信息
 * @return 基于数据库的repository
 */
@Bean
public RegisteredClientRepository registeredClientRepository(JdbcTemplate jdbcTemplate) {
    return new JdbcRegisteredClientRepository(jdbcTemplate);
}
配置授权管理服务
java
/**
 * 配置基于db的oauth2的授权管理服务
 *
 * @param jdbcTemplate               db数据源信息
 * @param registeredClientRepository 上边注入的客户端repository
 * @return JdbcOAuth2AuthorizationService
 */
@Bean
public OAuth2AuthorizationService authorizationService(JdbcTemplate jdbcTemplate, RegisteredClientRepository registeredClientRepository) {
    // 基于db的oauth2认证服务,还有一个基于内存的服务InMemoryOAuth2AuthorizationService
    return new JdbcOAuth2AuthorizationService(jdbcTemplate, registeredClientRepository);
}
配置授权确认管理服务
java
/**
 * 配置基于db的授权确认管理服务
 *
 * @param jdbcTemplate               db数据源信息
 * @param registeredClientRepository 客户端repository
 * @return JdbcOAuth2AuthorizationConsentService
 */
@Bean
public OAuth2AuthorizationConsentService authorizationConsentService(JdbcTemplate jdbcTemplate, RegisteredClientRepository registeredClientRepository) {
    // 基于db的授权确认管理服务,还有一个基于内存的服务实现InMemoryOAuth2AuthorizationConsentService
    return new JdbcOAuth2AuthorizationConsentService(jdbcTemplate, registeredClientRepository);
}
完整的AuthorizationConfig.java如下
java
/*
 *    Copyright [yyyy] [name of copyright owner]
 *
 *    Licensed under the Apache License, Version 2.0 (the "License");
 *    you may not use this file except in compliance with the License.
 *    You may obtain a copy of the License at
 *
 *        http://www.apache.org/licenses/LICENSE-2.0
 *
 *    Unless required by applicable law or agreed to in writing, software
 *    distributed under the License is distributed on an "AS IS" BASIS,
 *    WITHOUT WARRANTIES OR CONDITIONS OF ANY KIND, either express or implied.
 *    See the License for the specific language governing permissions and
 *    limitations under the License.
 */

package com.pigcloud.pigx.auth.config;

import com.nimbusds.jose.jwk.JWKSet;
import com.nimbusds.jose.jwk.RSAKey;
import com.nimbusds.jose.jwk.source.ImmutableJWKSet;
import com.nimbusds.jose.jwk.source.JWKSource;
import com.nimbusds.jose.proc.SecurityContext;
import com.pigcloud.pigx.auth.authentication.DeviceClientAuthenticationConverter;
import com.pigcloud.pigx.auth.authentication.DeviceClientAuthenticationProvider;
import org.springframework.context.annotation.Bean;
import org.springframework.context.annotation.Configuration;
import org.springframework.core.Ordered;
import org.springframework.core.annotation.Order;
import org.springframework.http.MediaType;
import org.springframework.jdbc.core.JdbcTemplate;
import org.springframework.security.config.Customizer;
import org.springframework.security.config.annotation.web.builders.HttpSecurity;
import org.springframework.security.core.userdetails.User;
import org.springframework.security.core.userdetails.UserDetails;
import org.springframework.security.core.userdetails.UserDetailsService;
import org.springframework.security.oauth2.core.AuthorizationGrantType;
import org.springframework.security.oauth2.core.ClientAuthenticationMethod;
import org.springframework.security.oauth2.core.oidc.OidcScopes;
import org.springframework.security.oauth2.jwt.JwtDecoder;
import org.springframework.security.oauth2.server.authorization.JdbcOAuth2AuthorizationConsentService;
import org.springframework.security.oauth2.server.authorization.JdbcOAuth2AuthorizationService;
import org.springframework.security.oauth2.server.authorization.OAuth2AuthorizationService;
import org.springframework.security.oauth2.server.authorization.client.JdbcRegisteredClientRepository;
import org.springframework.security.oauth2.server.authorization.client.RegisteredClient;
import org.springframework.security.oauth2.server.authorization.client.RegisteredClientRepository;
import org.springframework.security.oauth2.server.authorization.config.annotation.web.configuration.OAuth2AuthorizationServerConfiguration;
import org.springframework.security.oauth2.server.authorization.config.annotation.web.configurers.OAuth2AuthorizationServerConfigurer;
import org.springframework.security.oauth2.server.authorization.settings.AuthorizationServerSettings;
import org.springframework.security.oauth2.server.authorization.settings.ClientSettings;
import org.springframework.security.provisioning.InMemoryUserDetailsManager;
import org.springframework.security.web.SecurityFilterChain;
import org.springframework.security.web.authentication.LoginUrlAuthenticationEntryPoint;
import org.springframework.security.web.util.matcher.MediaTypeRequestMatcher;

import java.security.KeyPair;
import java.security.KeyPairGenerator;
import java.security.interfaces.RSAPrivateKey;
import java.security.interfaces.RSAPublicKey;
import java.util.UUID;

/**
 * 授权服务器配置
 *
 * @author heyuq
 */
@Configuration(proxyBeanMethods = false)
public class AuthorizationServerConfig {

    /**
     * 自定义同意授权页面。
     */
    private static final String CUSTOM_CONSENT_PAGE_URI = "/oauth2/consent";

    /**
     * 授权服务器端点配置
     *
     * @param http spring security核心配置类
     * @return 过滤器链
     * @throws Exception 抛出
     */
    @Bean
    @Order(Ordered.HIGHEST_PRECEDENCE)
    public SecurityFilterChain authorizationServerSecurityFilterChain(
            HttpSecurity http, RegisteredClientRepository registeredClientRepository,
            AuthorizationServerSettings authorizationServerSettings) throws Exception {

        // 应用OAuth2授权服务器的默认安全配置。
        OAuth2AuthorizationServerConfiguration.applyDefaultSecurity(http);

        DeviceClientAuthenticationConverter deviceClientAuthenticationConverter =
                new DeviceClientAuthenticationConverter(
                        authorizationServerSettings.getDeviceAuthorizationEndpoint());
        DeviceClientAuthenticationProvider deviceClientAuthenticationProvider =
                new DeviceClientAuthenticationProvider(registeredClientRepository);

        // 配置OAuth2授权服务器的安全过滤链,启用OpenID Connect 1.0。
        // OpenID Connect是OAuth 2.0的一个扩展,用于添加用户身份验证。
        http.getConfigurer(OAuth2AuthorizationServerConfigurer.class)
                // 设置设备码用户验证url(自定义用户验证页)
                .deviceAuthorizationEndpoint(deviceAuthorizationEndpoint ->
                        deviceAuthorizationEndpoint.verificationUri("/activate")
                )
                // 设置验证设备码用户确认页面
                .deviceVerificationEndpoint(deviceVerificationEndpoint ->
                        deviceVerificationEndpoint.consentPage(CUSTOM_CONSENT_PAGE_URI)
                )
                .clientAuthentication(clientAuthentication ->
                        // 客户端认证添加设备码的converter和provider
                        clientAuthentication
                                .authenticationConverter(deviceClientAuthenticationConverter)
                                .authenticationProvider(deviceClientAuthenticationProvider)
                )
                // 设置自定义用户确认授权页
                .authorizationEndpoint(authorizationEndpoint -> authorizationEndpoint
                        .consentPage(CUSTOM_CONSENT_PAGE_URI)
                )
                .oidc(Customizer.withDefaults());

        // @formatter:off
        http
            // 配置异常处理,当从授权端点未认证时,重定向到登录页面。
            // 这里定义了一个登录URL认证入口点,并指定它只适用于TEXT_HTML媒体类型。
            .exceptionHandling((exceptions) -> exceptions
                .defaultAuthenticationEntryPointFor(
                    new LoginUrlAuthenticationEntryPoint("/login"),
                    new MediaTypeRequestMatcher(MediaType.TEXT_HTML)
                )
            )
            // 配置OAuth2资源服务器,接受用户信息和/或客户端注册的访问令牌。
            // 这里使用JWT(JSON Web Tokens)作为访问令牌的格式。
            .oauth2ResourceServer((resourceServer) -> resourceServer
                .jwt(Customizer.withDefaults()));
        // @formatter:on

        // 构建并返回配置好的SecurityFilterChain对象。
        return http.build();
    }

    /**
     * 默认安全过滤器配置
     *
     * @param http spring security核心配置类
     * @return 过滤器链
     * @throws Exception 抛出
     */
    @Bean
    @Order(2)
    public SecurityFilterChain defaultSecurityFilterChain(HttpSecurity http)
            throws Exception {

        // @formatter:off
        http
            // 配置默认的HTTP请求授权规则,要求所有请求都必须经过身份验证。
            .authorizeHttpRequests((authorize) -> authorize
                // 放行静态资源
                .requestMatchers("favicon.svg", "/assets/**", "/webjars/**", "/error").permitAll()
                .anyRequest().authenticated()
            )
            // 配置表单登录,使用默认设置。
            // 这处理从授权服务器过滤链重定向到登录页面的情况。
            // .formLogin(Customizer.withDefaults())
            .formLogin(formLogin ->
                formLogin
                    .loginPage("/login")
                    .permitAll()
            );
        // @formatter:on

        return http.build();
    }

    /**
     * 先暂时配置一个基于内存的用户,框架在用户认证时会默认调用
     * {@link UserDetailsService#loadUserByUsername(String)} 方法根据
     * 账号查询用户信息,一般是重写该方法实现自己的逻辑
     *
     * @return UserDetailsService
     */
    @Bean
    public UserDetailsService userDetailsService() {

        // 创建一个具有默认密码编码器的用户详情对象。
        // 这里定义了一个用户名为"admin",密码为"password",角色为"ADMIN"的用户。
        UserDetails userDetails = User.withUsername("admin")
                .password("{bcrypt}$2a$10$dXJ3SW6G7P50lGmMkkmwe.20cQQubK3.HZWzG3YB1tlRy.fqvM/BG")
                .roles("ADMIN")
                .authorities("message_read", "message_write")
                .build();

        // 返回一个基于内存的用户详情服务,它仅包含上面定义的用户。
        return new InMemoryUserDetailsManager(userDetails);
    }

    /**
     * 配置客户端Repository
     *
     * @param jdbcTemplate    db 数据源信息
     * @return 基于数据库的repository
     */
    @Bean
    public RegisteredClientRepository registeredClientRepository(JdbcTemplate jdbcTemplate) {
        // 创建一个RegisteredClient对象,并设置其属性。
        // 使用UUID生成一个唯一的客户端ID。
        RegisteredClient registeredClient = RegisteredClient.withId(UUID.randomUUID().toString())
                // 设置客户端ID为"messaging-client"。
                .clientId("messaging-client")
                // 设置客户端秘密为"{noop}secret",这里的"{noop}"表示不加密。
                .clientSecret("{noop}secret")
                // 设置客户端认证方法为基于客户端秘密的基本认证。
                .clientAuthenticationMethod(ClientAuthenticationMethod.CLIENT_SECRET_BASIC)
                // 设置授权类型为授权码。
                .authorizationGrantType(AuthorizationGrantType.AUTHORIZATION_CODE)
                // 添加刷新令牌授权类型。
                .authorizationGrantType(AuthorizationGrantType.REFRESH_TOKEN)
                // 添加客户端凭证授权类型。
                .authorizationGrantType(AuthorizationGrantType.CLIENT_CREDENTIALS)
                // 设置授权码流程的重定向URI。
                .redirectUri("http://127.0.0.1:8080/login/oauth2/code/messaging-client-oidc")
                // 设置另一个重定向URI,可能用于其他授权流程。
                .redirectUri("http://127.0.0.1:8080/authorized")
                // 仅用于测试,接收授权码。
                .redirectUri("https://www.pigx.cn")
                // 设置用户注销后的重定向URI。
                .postLogoutRedirectUri("http://127.0.0.1:8080/logged-out")
                // 添加OpenID范围。
                .scope(OidcScopes.OPENID)
                // 添加Profile范围。
                .scope(OidcScopes.PROFILE)
                // 添加自定义范围"message.read"。
                .scope("message.read")
                // 添加自定义范围"message.write"。
                .scope("message.write")
                // 设置客户端设置,要求每次都需要用户授权同意。
                .clientSettings(ClientSettings.builder().requireAuthorizationConsent(true).build())
                .build(); // 构建RegisteredClient对象。

        // 创建另一个RegisteredClient对象,名为deviceClient,用于设备授权
        RegisteredClient deviceClient = RegisteredClient.withId(UUID.randomUUID().toString())
                .clientId("device-messaging-client")
                // 公共客户端
                .clientAuthenticationMethod(ClientAuthenticationMethod.NONE)
                // 设备码授权
                .authorizationGrantType(AuthorizationGrantType.DEVICE_CODE)
                .authorizationGrantType(AuthorizationGrantType.REFRESH_TOKEN)
                // 自定scope
                .scope("message.read")
                .scope("message.write")
                .build();

        // 创建一个JdbcRegisteredClientRepository实例,用于将已注册的客户端保存到数据库中
        JdbcRegisteredClientRepository registeredClientRepository = new JdbcRegisteredClientRepository(jdbcTemplate);

        // 初始化客户端
        if (registeredClientRepository.findByClientId(registeredClient.getClientId()) == null) {
            registeredClientRepository.save(registeredClient);
        }

        // 创建另一个RegisteredClient对象,名为deviceClient,用于设备授权
        if (registeredClientRepository.findByClientId(deviceClient.getClientId()) == null) {
            registeredClientRepository.save(deviceClient);
        }

        return registeredClientRepository;
    }

    /**
     * 配置基于db的oauth2的授权管理服务
     *
     * @param jdbcTemplate               db数据源信息
     * @param registeredClientRepository 上边注入的客户端repository
     * @return JdbcOAuth2AuthorizationService
     */
    @Bean
    public OAuth2AuthorizationService authorizationService(JdbcTemplate jdbcTemplate, RegisteredClientRepository registeredClientRepository) {
        // 基于db的oauth2认证服务,还有一个基于内存的服务InMemoryOAuth2AuthorizationService
        return new JdbcOAuth2AuthorizationService(jdbcTemplate, registeredClientRepository);
    }

    /**
     * 存储新授权同意和查询现有授权同意的核心组件。它主要由实现 OAuth2 授权请求流(例如 authorization_code 授权)的组件使用
     *
     * @param jdbcTemplate               db数据源信息
     * @param registeredClientRepository 客户端repository
     * @return JdbcOAuth2AuthorizationConsentService
     */
    @Bean
    public JdbcOAuth2AuthorizationConsentService authorizationConsentService(JdbcTemplate jdbcTemplate,
                                                                             RegisteredClientRepository registeredClientRepository) {
        // Will be used by the ConsentController
        return new JdbcOAuth2AuthorizationConsentService(jdbcTemplate, registeredClientRepository);
    }

    /**
     * 配置jwk源,使用非对称加密,公开用于检索匹配指定选择器的JWK的方法
     *
     * @return JWKSource
     */
    @Bean
    public JWKSource<SecurityContext> jwkSource() {
        // 生成RSA密钥对。
        KeyPair keyPair = generateRsaKey();

        // 从密钥对中获取公钥。
        RSAPublicKey publicKey = (RSAPublicKey) keyPair.getPublic();

        // 从密钥对中获取私钥。
        RSAPrivateKey privateKey = (RSAPrivateKey) keyPair.getPrivate();

        // 使用公钥和私钥创建一个RSAKey对象,并为其分配一个随机的UUID作为keyID。
        RSAKey rsaKey = new RSAKey.Builder(publicKey)
                .privateKey(privateKey)
                .keyID(UUID.randomUUID().toString())
                .build();

        // 创建一个包含这个RSAKey的JWKSet对象。
        JWKSet jwkSet = new JWKSet(rsaKey);

        // 返回一个不可变的JWKSet对象,这通常是为了保证安全而设计的。
        return new ImmutableJWKSet<>(jwkSet);
    }

    /**
     * 私有方法,用于生成RSA密钥对。
     *
     * @return KeyPair
     */
    private static KeyPair generateRsaKey() {
        KeyPair keyPair;
        try {
            // 实例化一个RSA密钥对生成器。
            KeyPairGenerator keyPairGenerator = KeyPairGenerator.getInstance("RSA");

            // 初始化密钥对生成器,指定密钥长度为2048位。
            keyPairGenerator.initialize(2048);

            // 生成RSA密钥对。
            keyPair = keyPairGenerator.generateKeyPair();
        } catch (Exception ex) {
            // 如果发生异常,则抛出IllegalStateException。
            throw new IllegalStateException(ex);
        }
        // 返回生成的密钥对。
        return keyPair;
    }

    /**
     * 用于解码签名访问令牌的 JwtDecoder 实例。
     *
     * @param jwkSource jwk源
     * @return JwtDecoder
     */
    @Bean
    public JwtDecoder jwtDecoder(JWKSource<SecurityContext> jwkSource) {
        // 使用OAuth2AuthorizationServerConfiguration类中的静态方法jwtDecoder,
        // 根据提供的JWKSource对象创建JwtDecoder。
        // JwtDecoder是用于解码JWT的组件。
        return OAuth2AuthorizationServerConfiguration.jwtDecoder(jwkSource);
    }

    /**
     * 配置OAuth 2.0授权服务器。
     *
     * @return AuthorizationServerSettings
     */
    @Bean
    public AuthorizationServerSettings authorizationServerSettings() {
        // 创建一个AuthorizationServerSettings对象,并使用默认设置。
        // 这个对象通常用于配置授权服务器的各种设置。
        return AuthorizationServerSettings.builder().build();
    }

}
注意
配置类中提到的基于内存存储的类禁止用于生产环境
在application.yml中配置db数据源
yaml
spring:
  datasource:
    # 定义数据源类型为HikariDataSource
    type: com.zaxxer.hikari.HikariDataSource
    # 定义数据库驱动类为MySQL的JDBC驱动
    driver-class-name: com.mysql.cj.jdbc.Driver
    # 定义数据库连接URL,使用了Spring的属性占位符,可以在运行时从环境变量或配置文件中获取
    url: jdbc:mysql://${MYSQL-HOST:pigx-mysql}:${MYSQL-PORT:3306}/${MYSQL-DB:pigx}?useSSL=false&serverTimezone=Asia/Shanghai&useUnicode=true&characterEncoding=UTF-8&allowPublicKeyRetrieval=true&useJDBCCompliantTimezoneShift=true&zeroDateTimeBehavior=convertToNull
    # 定义数据库用户名为属性占位符,可以在运行时从环境变量或配置文件中获取
    username: ${MYSQL-USER:root}
    # 定义数据库密码为属性占位符,可以在运行时从环境变量或配置文件中获取
    password: ${MYSQL-PWD:pigx}
    # Hikari连接池配置
    hikari:
      # 连接池的最大大小为10
      maximum-pool-size: 10
      # 连接池的最小空闲连接数为2
      minimum-idle: 2
      # 连接超时时间为30000毫秒
      connection-timeout: 30000
      # 空闲连接的超时时间为600000毫秒
      idle-timeout: 600000
      # 泄漏检测的阈值时间为10000毫秒
      leak-detection-threshold: 10000
      # 连接池的名称为HikariPool
      # pool-name: HikariPool
      # 是否注册MBeans,用于监控和管理连接池,值为true
      register-mbeans: true